Wax Casting Aluminum Tips for Beginners How to Get Started?
Wax Casting Aluminum is an intriguing process. It combines art and engineering. Beginners might find it challenging but rewarding. As industry expert John Ribble states, "Mastering Wax Casting Aluminum opens doors to endless creativity."
The first step is understanding the basics of wax casting. It involves creating a model, coating it in a ceramic shell, and then melting the wax away. This technique requires precision. Many struggle with temperature control, which can lead to flawed results.
Many artists learn through trial and error. There's beauty in imperfection. Each piece tells a story, showcasing both skill and mistakes. Embracing these flaws can spark innovation. Begin your journey into the world of Wax Casting Aluminum, and discover where your creativity can take you.
Understanding Wax Casting: Basics of Aluminum Casting Techniques
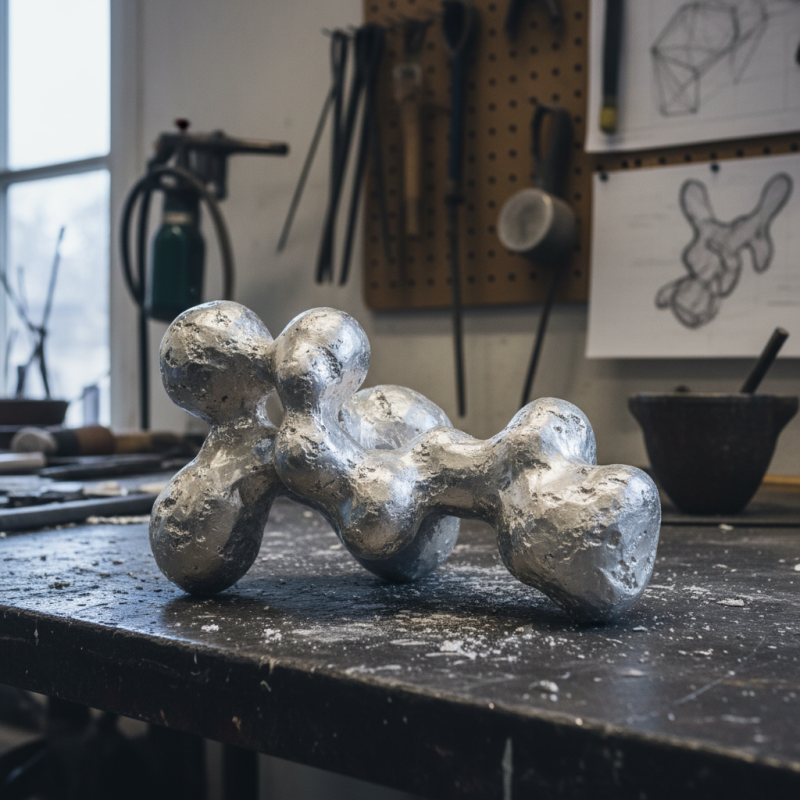
Wax casting is an intriguing method for shaping aluminum. It allows artists and hobbyists to create intricate designs. Understanding the basics is essential for beginners. The process starts with crafting a wax model. This model can be as simple or complex as desired. Precision is key; small details can make a big difference.
After completing the model, it’s time to make a mold. This often involves a mixture of materials. The mold encases the wax, allowing you to shape the aluminum. The next step might seem straightforward, but many encounter problems. The wax can melt unevenly, causing flaws. Watching for temperature changes is crucial.
Once the mold is ready, pour the aluminum. It’s exciting to see the final product take shape. However, beware of bubbles. They can spoil the design. Patience is important. Each attempt provides lessons. Reflect on mistakes to improve future projects. Test different techniques to find your style.
Wax Casting Aluminum Techniques: Understanding the Basics
Essential Materials for Wax Casting in Aluminum Projects
When starting wax casting in aluminum, having the right materials is key. You'll need a wax model, a mold, and aluminum. Choose wax that melts cleanly and holds detail well. Most beginners work with a simple pattern. You can carve one from a larger block of wax or use 3D printing for precision.
Next, you need a mold. Silicone molds are popular because they are flexible and reusable. They allow for easy extraction of the wax model. Keep in mind that the mold must withstand heat without warping. As you gather materials, remember to consider safety gear. Wear gloves and safety glasses when melting wax or handling aluminum.
Tips for beginners include starting with small projects. Small pieces are easier to manage and make mistakes less costly. Don’t rush the process; take your time to learn. Experiment with different wax types and mold materials to find what works for you. Document your progress and note what you like and dislike about each method. Reflection is essential for improving your skills.
Wax Casting Aluminum Tips for Beginners
| Material |
Description |
Purpose |
| Wax |
Specially formulated wax for casting |
To create wax models for casting |
| Aluminum |
AL-6061 alloy, suitable for casting |
Final material after casting |
| Investment Powder |
Fine powder used in the mold making process |
To create a durable mold for the wax model |
| Melting Furnace |
Equipment for melting aluminum |
To melt aluminum for pouring |
| Cooling Bucket |
Container for cooling aluminum castings |
To safely cool down the cast metal |
| Safety Gear |
Gloves, goggles, and protective clothing |
To ensure safety during the process |
Step-by-Step Process of Creating Your First Wax Model
Creating your first wax model can be both exciting and challenging. Start with a clear concept. Sketch your design ideas first. This can help you visualize the final product. According to industry reports, well-planned designs increase the success rate by 30%.
Make your wax mixture. Use parrafin wax for beginners; it’s easier to work with. Melt it slowly over low heat to avoid burning. Once melted, pour it into your mold. Ensure it fills every intricate detail. This is where patience is vital. You might find imperfections in your first attempt. Don't be discouraged. Learning often comes through making mistakes.
Once cooled, inspect your model closely. Look for flaws or rough patches. This is a crucial step. Refining your model may turn those flaws into your strengths. The industry emphasizes that repeat practice leads to improvement. Embrace the learning curve. Each attempt builds skill and confidence. Understand that even experienced casters continue to face challenges. It is all part of the art of wax casting.
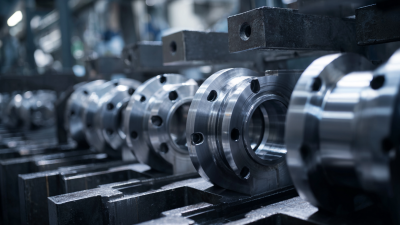
Preparing and Pouring Aluminum: Key Tips for Beginners
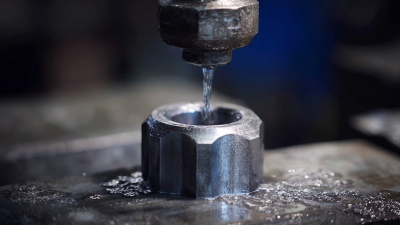
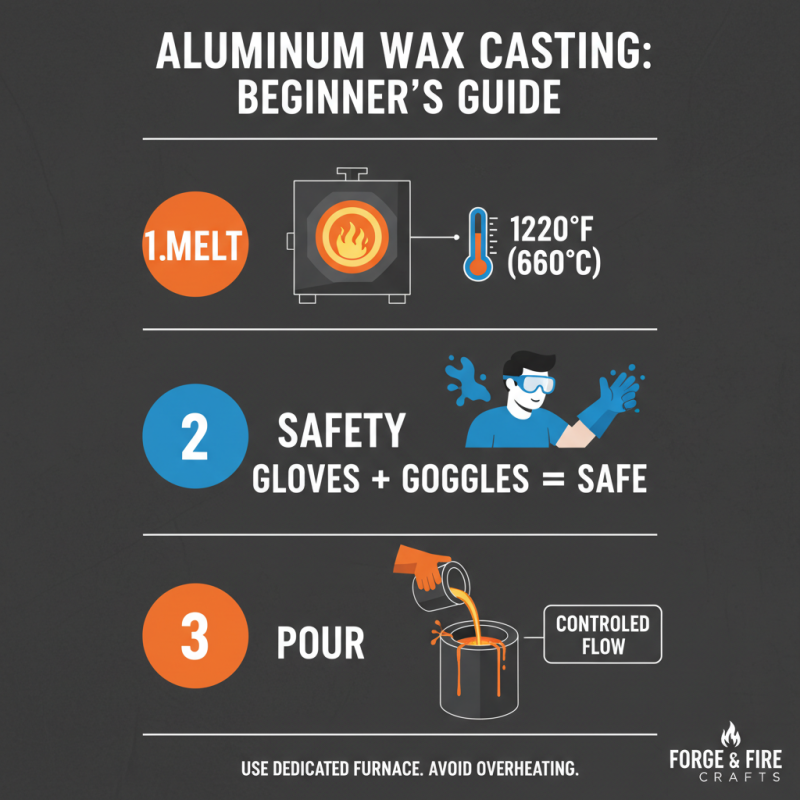
Preparing and pouring aluminum for wax casting can be daunting for beginners. Understanding the process is key. When melting aluminum, use a dedicated furnace. It helps achieve the right temperature without overheating. Aluminum's melting point is around 1220°F (660°C). Always wear appropriate safety gear. Gloves and goggles are essential to protect against splashes.
Tip: Temperature control is crucial. If the aluminum is too cool, it won't flow properly. Too hot, and it can create irregularities. Maintain a consistent heat while monitoring closely. Pouring aluminum requires practice. Aim for a steady, controlled flow into your mold. Jittery movements can cause air bubbles and defects in your cast.
Another important tip: always preheat your mold. This minimizes thermal shock and helps the aluminum set properly. Pouring into a cold mold can lead to cracks. Experiment with different mold materials but be cautious. Some may not withstand the high temperature of molten aluminum. Reflect on your pouring techniques, as they influence the quality of your finish. Practice makes perfect, but mistakes are part of the journey. Learn from them to improve your skills.
Finishing Touches: Cleaning and Polishing Your Aluminum Casts
Cleaning and polishing your aluminum casts can make a significant difference in their appearance. After your wax casting is complete, there’s often a rough surface. This can be frustrating, especially if you've spent hours preparing the mold. Start by removing any excess material. Use a wire brush or sandpaper for this task. Take your time with this step; rushing can lead to mistakes.
Once the surface is cleared, it’s time for polishing. Begin with a medium-grit sandpaper and gradually move to finer grits. Pay attention to the texture. It might take several passes to achieve a smooth finish. Be prepared for unanticipated scratches or blemishes. If you notice a ding, don't panic. Instead, it’s an opportunity to learn. Reflect on your technique and make adjustments for next time.
Finally, a cleaning solution can further enhance your cast's shine. Wipe the surface with a soft cloth to remove dust. Go for a gentle polish; using too much pressure might cause new scratches. After polishing, inspect your work closely. This close-up look can reveal imperfections you might have missed earlier. Embrace the learning process as you hone your skills in this intricate craft.


 +86 180 0293 5268
 CONTACT Shixin
 CONTACT Shixin
 CONTACT Shixin